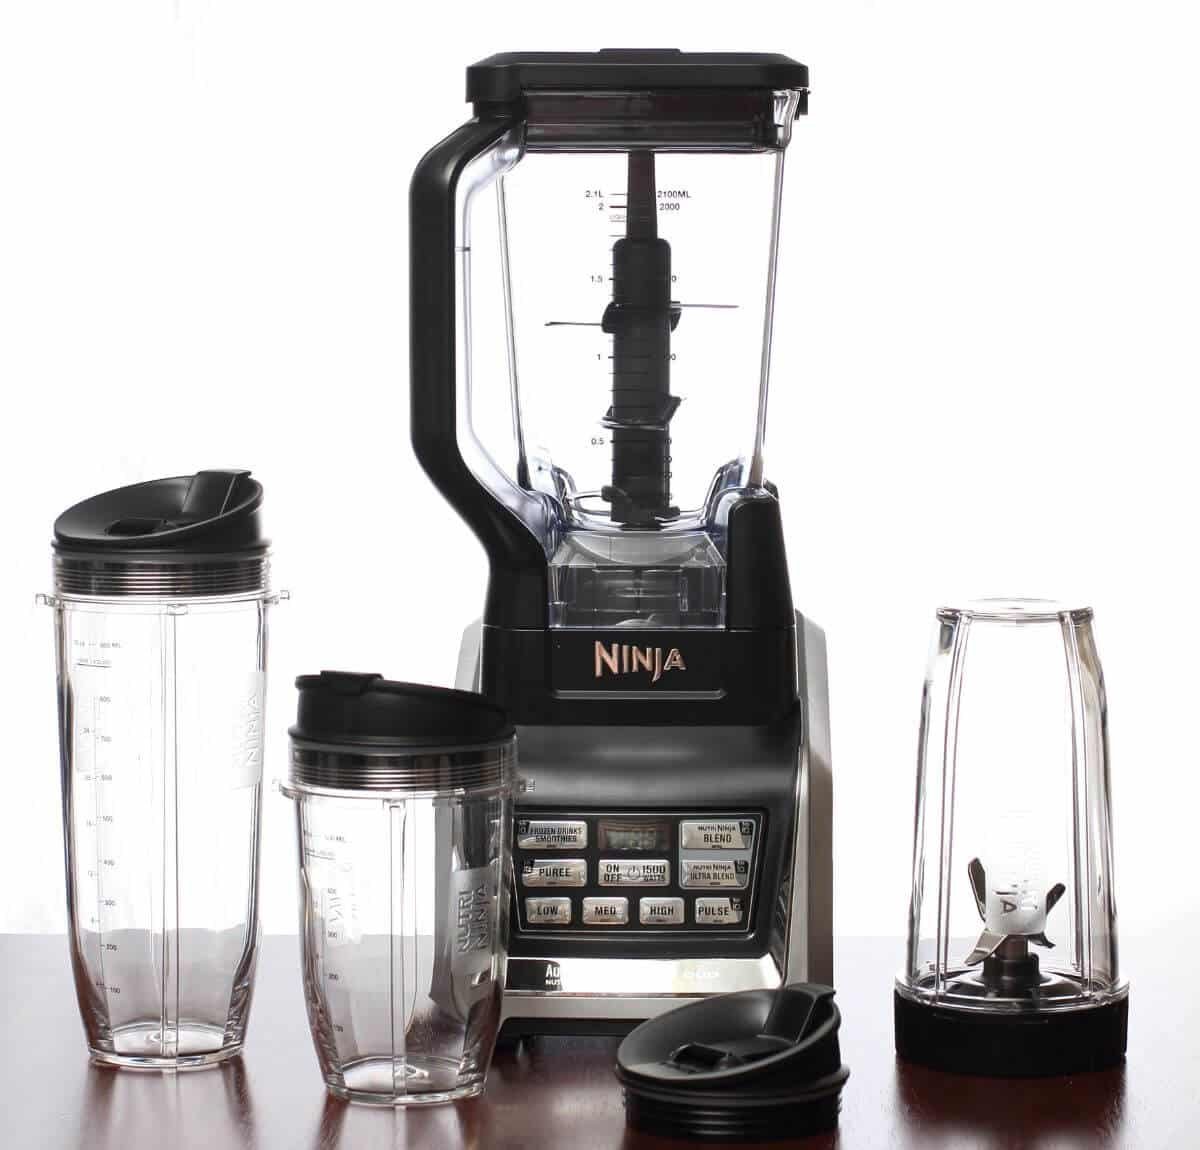
How To Clean a Ninja Blender Base : 7 Easy Steps
How to clean a Ninja Blender base? It is one of the most common questions from Ninja Blender users. The Ninja Blender is a versatile and powerful kitchen appliance that can help you create delicious smoothies, soups, and sauces. It has made kitchen tasks more efficient and enjoyable. However, to ensure optimal performance and longevity, it’s crucial to clean and maintain your Ninja blender regularly.
In this comprehensive guide, I will show you the step-by-step process of cleaning your Ninja blender, specifically focusing on the blender base.
Why is it important to clean your Ninja blender base?
Cleaning your Ninja blender base is essential for many reasons. First of all regular cleaning helps remove dirt, food particles, and debris that can accumulate in the blender base. By keeping the base clean, you ensure that the motor and other components can function optimally. Moreover, regular cleaning and maintaining your Ninja blender base will extend its lifespan as well. And you can also avoid costly repairs or replacements.
Now that you understand the importance of cleaning your Ninja blender base, let’s move on to the step-by-step process.
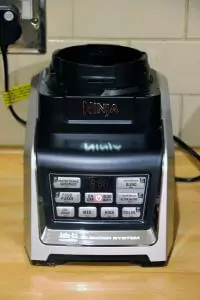
How to Open the Base of a Ninja Blender
Before you can clean the base of your Ninja blender, you need to know how to open it. Here’s a simple guide on how to open the base of a Ninja blender:
First, locate the screws or clips that are securing it. Different models may have different mechanisms for securing the base. If your blender has screws, use the appropriate screwdriver to remove them. If it has clips, carefully release them by pressing or sliding them in the indicated direction. Once the screws or clips are removed gently lift the base to detach it completely.
Note: Don’t forget to unplug the blender before starting. Not all Ninja blender models allow for easy removal of the base. Some models have sealed bases that cannot be opened by the user. In such cases, it is best to consult the user manual or contact the manufacturer for specific instructions on cleaning the base.
How to Clean the Ninja Blender Base
Now that you have successfully opened the base of your Ninja blender, let’s proceed with the cleaning process. Here’s how to clean the Ninja blender base:
Step – 1: Wipe Down the Base
Unplug your blender first. Then, dampen a soft cloth or sponge with warm water and a few drops of dish soap. After that, gently wipe down the exterior of the base. Remove the surface dirt or grime. Pay extra attention to any stubborn stains or food particles.
Step – 2: Clean Hard-to-Reach Areas
To clean hard-to-reach areas or crevices on the base, use a toothbrush or small brush. Dip the brush into the solution of soapy water. Then, gently scrub the areas. Ensure that you remove all trapped debris.
Step – 3: Disinfect with Vinegar (Optional)
For an extra level of cleanliness, you can use vinegar. Fill a spray bottle with equal amounts of Water and Vinegar. Spray the vinegar solution onto the base and let it sit for a few minutes. Vinegar is a natural disinfectant that can help eliminate bacteria and odors.
Step – 4: Remove Stains with Baking Soda (Optional)
If there are any stubborn stains on the base, you can remove them with baking soda. Make a paste with water and baking soda. Apply the paste to the soiled areas, and then wait a few minutes before removing it. Then, use a soft cloth or sponge to gently scrub the spots. Rinse with warm water to remove the baking soda residue.
Step – 5: Dry and Reassemble the Blender
After cleaning, use a dry cloth or towel to thoroughly dry the base. Make sure there is no moisture left before reassembling the blender.
Once the base is completely dry, carefully reassemble the blender according to the manufacturer’s instructions.
How to Clean a Moldy Blender Base
If you neglect to clean your Ninja blender base then it can be moldy. In that case, It becomes a little bit tough to clean the base. But you still can clean a Moldy Blender Base by following the steps below:
Step 1: Safety Precautions
Before cleaning a moldy blender base, it’s important to take safety precautions. Mold can emit spores that can be harmful if inhaled. Make sure to wear gloves, and a mask, and work in a well-ventilated area to minimize exposure.
Step – 2: Disassemble the Blender Base
Follow the instructions provided earlier to disassemble the blender base. This will allow you to access all areas where mold may be present.
Step – 3: Remove Visible Mold
Using a damp cloth or sponge, wipe away all the visible mold from the base and other components. Dispose of the cloth or sponge after use to prevent the spreading of the mold.
Step – 4: Clean with Vinegar Solution
Create a solution of equal parts vinegar and water in a spray bottle. Spray the solution onto the affected areas of the base and let it sit for a few minutes. Vinegar is a natural disinfectant that can help kill mold and remove odors.
Step – 5: Scrub with a Brush
Use a toothbrush or small brush to scrub the moldy areas of the base. This will help remove any remaining mold and loosen any stuck-on debris.
Step – 6: Rinse and Dry Thoroughly
After scrubbing, rinse the base with warm water to remove any vinegar residue. Ensure that all mold and cleaning solutions are thoroughly rinsed off. Use a clean, dry cloth or towel to dry the base completely.
Step – 7: Reassemble and Test
Once the base is dry, reassemble the blender according to the manufacturer’s instructions. Plug in the blender and perform a test run to ensure that it is functioning properly.
How to Take Apart a Ninja Blender to Clean It
Ninja Blender is a powerful and versatile kitchen appliance that can handle a wide range of blending tasks. However, after extended use, it’s common for the blender to accumulate gunk and residue in hard-to-reach places. That’s why, disassembling your Ninja blender is crucial for more thorough cleaning.
To take apart your Ninja Blender properly, just unplug the blender and disassemble all the components of your blender. Then clean all the Disassembled Parts including blades, base, lid, Rubber Gasket, etc.
How to Clean a Cloudy Ninja Blender
Over time, your Ninja blender may develop a cloudy appearance. Generally, mineral deposits or hard water stains are responsible for such cloudiness. Here’s how to clean a cloudy Ninja blender:
Step – 1: Create a Vinegar Solution
Mix equal amounts of water and white vinegar in a bowl or container. This solution will help break down the mineral deposits and remove cloudiness.
Step – 2: Soak the Blender Jar
Place the blender jar or pitcher in the vinegar solution. Then, let it soak for about 30 minutes to an hour. This will allow the vinegar to dissolve the mineral deposits and loosen any stains.
Step – 3: Scrub the Jar
After soaking, use a soft brush or sponge to scrub the inside of the jar. Pay extra attention to cloudy areas. Scrub in a circular motion to remove any remaining deposits or stains.
Step – 4: Rinse Thoroughly
Once you have thoroughly scrubbed the jar, rinse it with warm water. Make sure to rinse it well and ensure that all traces of the vinegar solution are gone.
Step – 5: Dry and Reassemble
After rinsing, dry the jar with a clean cloth or towel. Once dry, reassemble the blender by attaching the jar to the base. And to secure it, turn it counterclockwise.
How do you get stains out of a Ninja Blender
Over time, the jar can develop tough stains and odors that can affect the overall cleanliness of your blender. Vinegar and Baking soda are excellent cleaning agents that can help remove tough stains and odors from the blender jar. Here’s how you get stains out of a Ninja Blender:
Make a paste by mixing vinegar and baking soda. Apply the paste to the stained areas of the blender jar. Allow the paste to sit for a few minutes, or even overnight for tougher stains. After that, rinse the jar thoroughly to remove the paste and any remaining stains.
By following these methods, you can remove stains from your Ninja blender jar looking it clean and fresh.
Additional Tips for Maintaining Your Ninja Blender
To ensure the longevity and optimal performance of your Ninja blender, here are some additional tips for maintenance:
- Clean after each use: Make it a habit to clean your blender after each use. This will prevent any residue from accumulating.
- Avoid harsh chemicals: When cleaning the base, avoid using harsh chemicals. Because this can damage the surface or electronic components.
- Regularly check for wear and tear: Inspect your blender base regularly for any signs of wear and tear. If you notice any cracks, loose parts, or unusual noises, contact the manufacturer for guidance.
- Store in a clean and dry place: After cleaning and drying your blender base, store it in a clean and dry place to prevent dust, dirt, or moisture from accumulating.
- Follow manufacturer’s instructions: Always refer to the manufacturer’s instructions for specific cleaning and maintenance guidelines for your Ninja blender model.
By following these tips, you can keep your Ninja blender base clean and well-maintained.
Conclusion
Cleaning and maintaining your Ninja blender base is essential for optimal performance, longevity, and hygiene. By regularly cleaning your Ninja blender base you can ensure that your blender remains in top condition.
Remember to always follow the manufacturer’s instructions. Wear protective gear when necessary and handle your blender with care. With proper cleaning and maintenance, your Ninja blender will continue to be a reliable and versatile tool in your kitchen for years to come.
Frequently Asked Questions
Can the Ninja Blender base get wet?
No, the Ninja Blender base should not be submerged in water or exposed to excessive moisture. It has electrical parts that could be harmed by water. Only the removable parts, such as the jar and blade assembly, should be cleaned with water.
Can you wash the bottom part of a blender?
The bottom part of the blender, which includes the base and electrical components, should not be washed with water. Instead, use a damp cloth or sponge to wipe down the surface and remove any dirt or spills.
How do you clean a Ninja Blender head?
To clean the head or top part of your Ninja Blender, first, unplug the blender and remove the jar or pitcher. Use a damp cloth or sponge with a mild dish soap solution to wipe down the head, including the buttons and knobs. Rinse with clean water and dry thoroughly before reassembling and using the blender again.
Do Ninja blenders crack easily?
Ninja blenders are made with durable materials. But they can still crack or break if mishandled or dropped. To prevent damage, handle your Ninja blender with care and avoid dropping it or subjecting it to excessive force.
Can you submerge a blender in water?
No, you should not submerge a blender, including the base, in water. The electrical components of the blender can be damaged by water. Only the removable parts, such as the jar and blade assembly, should be cleaned with water.
How much vinegar do I use to clean my Ninja?
To clean your Ninja blender, you can create a vinegar cleaning solution by mixing equal parts white vinegar and water. This solution can be used to clean the jar, blade assembly, and other removable parts of the blender.
Is a Ninja as strong as a Vitamix?
While both Ninja and Vitamix blenders are high-quality and powerful, Vitamix blenders are generally considered to be more powerful and durable. However, Ninja blenders offer excellent performance at a more affordable price point.
Yes, baking soda can help remove mold. Using water and baking soda create a paste. Then, apply it to the moldy areas. Allow it to sit for a few minutes before scrubbing with a soft brush or sponge. Rinse thoroughly with water and dry completely.